


How to use a 4k TV as a computer monitor
I like big, high resolution monitors. The bigger the better. I can’t understand how so many young developers and engineers seem to be content to peer into the tiny screens on their Macbooks that offer only a few visible lines of code in perhaps two simultaneous columns, with any web-based reference material in a window hidden behind the main IDE. I never use a laptop unless I’m forced to by circumstance and much prefer a desktop with the biggest monitor I can lay my hands on.
For the last few years I’ve been quite content with my 27″ AH-IPS display, a Crossover 27qw which is basically a reject LG panel repackaged and sold off cheap by Korean entrepreneurs.
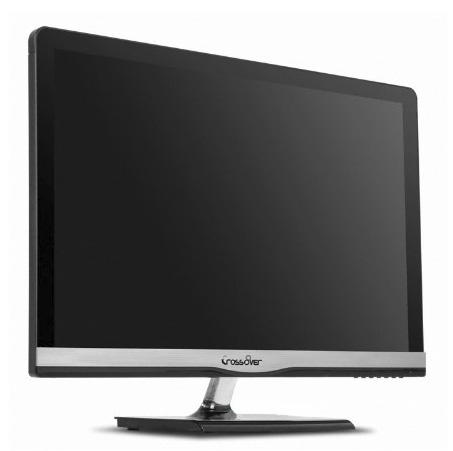
My 27″ Korean monitor
It was and still is very nice but for the last year or so I’ve had my eye on an upgrade and last week I finally did it and am now the proud owner of a 43″ Sony Bravia TV doing duty as the highest quality monitor with the most perfect picture I’ve ever seen.
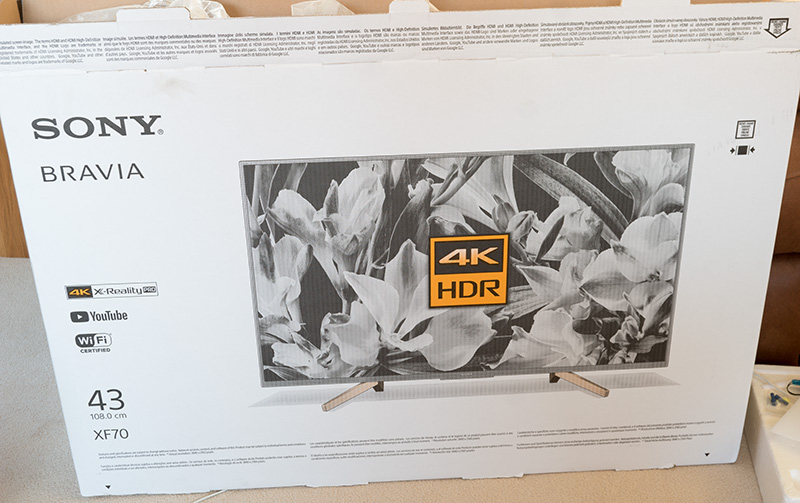
Stock image of the Sony 4k TV
The rest of this blog is a guide to walk you through the minefield that awaits should you decide that you really want to use a 4k TV as a computer monitor. I don’t play games or watch videos on my computer so I will focus entirely on its use as a developer and engineering workstation display.
Do you really want to do this?
Large, real computer monitors exist. Just do a Google search for 43″ monitor and you’ll see what’s out there. So why bother with a TV? Price is one reason. 4k TVs can generally be had cheaper than monitors and, being consumer electronics, tend to show up regularly in special offers and sales.
Another reason is the panel type. My Crossover 27qw has a glossy panel popularised a decade or so ago by the monitors that came with the Mac Pro. After I got over the reflections it produced I now can’t do without the vibrant colours and crisp detail that you get. Monitors typically, but not always, come with a matte panel that reduces reflections, softens detail, and in the strongest cases produces a ‘sparkly’ image. You may want this. If you do then you have to buy a monitor because there are no matte TVs.
Why not just add another monitor so you’ve got two? This is the configuration I run with at work. Granted, a pair of 2560×1440 monitors delivers more pixels than a single 4k monitor but you have to contend with the obvious split in the middle and also the inconsistency in colour, no matter how slight, that there will inevitably be between any two monitors. It will always feel like two displays rather than one big one.
Decide on the panel technology
The two major LCD panel types are VA and IPS. Samsung popularised VA, LG and Philips did the same for IPS. These days though the lines are blurred with manufacturers offering both panel types. For the purposes of this article I’m going to ignore OLED because they’re so far out of my price range that I never even considered them when choosing a TV to use as a monitor. I’m also going to ignore TN panels because they’re cheap rubbish that look awful from any angle. Never buy a TN panel fitted to anything.
IPS has the edge when it comes to accurate colour reproduction and consistent colours when viewed at an angle. VA wins when it comes to contrast and deep, solid blacks. If your main use is to play games and consume online content like YouTube then VA is probably for you. If you process photographs or create professional content then IPS is likely to be the panel for you. A developer or engineer using desktop applications is likely to be happy with either. For my use I decided I wanted to stick with the IPS technology that I’ve been using for years.
I actually went to several local stores where they have banks of TVs on display and looked at every one of them from the kind of close-up angles that I might use as a monitor and to be honest it was impossible for me to point at one and say: “that’s IPS” or “that’s VA”. They all looked great running their canned store demo modes, but to me the Sony Bravia panels looked the best of all and that went a long way in influencing my decision.
Decide on the screen size
There are two parts to this. Firstly and most obviously the TV is going to be sitting on your desk so get your tape measure out and work out if it’s going to physically fit. Take into account that it won’t have a VESA mount so you’re going to have to use the supplied stand. Work out where the feet of the stand are going to land and how far forward towards you it’s going to place the display. You don’t want a 43″ panel a few inches from your face.
If this is your first glossy panel then take into account the position of any light sources such as house windows. A window directly behind you will appear as a bright reflection, potentially ruining your ability to see the screen.
Secondly, work out the number of pixels per inch. There’s a calculator here to help you. My old 27″ monitor has a resolution of 2560×1440 giving a pixel pitch of 108ppi. I’m completely happy with the way that looks on-screen. With no Windows scaling everything is the right size for my seating position and eyesight.
I entered the 3840×2160 resolution and 43″ screen size for a 4k TV and found that the pixel pitch was 102ppi, more or less the same as my 27″. This was looking good. Just to make sure I entered the next step up: 49″ and it came up with 90ppi which is the same as the 24″ 1920×1080 monitors that I’m obliged to use at work and frankly these look terrible to me because I can easily make out the individual pixels and fonts look blocky and low resolution. For my requirements it had to be 43″. You may differ so take care with this decision. There’s little point in buying a monitor with 4k of screen resolution and then having to magnify everything and ending up with the same amount of information on display as you had with your existing monitor.
Pick a model
Do your Googling and find a model that looks right and is within your price range. Read the reviews and try to identify whether it’s VA or IPS. This information may be hard to find because the consumer TV market isn’t interested in technical terms that the marketing department haven’t found a way to dumb-down into a way to sell more sets. Don’t assume that because you’ve found out that the 51″ model is the right technology then the 43″ model will also be. Some manufacturers use different panel types within the same range.
Avoid anything by LG because they’ve invented their own “RGBW” pixel substructure that is totally unsuitable for monitor use. Some say it’s not exactly great for TV use either. A bit of a foot-shot from LG there.
Remember that you’re buying a monitor not a TV. Buying “up the range” often means the same panel with more firmware features like picture processing, HDR, local dimming, embedded “smart” functions etc. You will disable all these features and you will never use smart functions in a monitor so don’t be tempted to pay extra for them. You just want the panel.
Will it connect to a computer?
Time to get technical and read the manual. It’ll be online at the manufacturer’s website as a PDF. Find it and download it.
The TV market has standardised on HDMI connectors. That’s fine, but the HDMI specification has been revised several times as display resolutions have increased. Your selected TV must support HDMI 2.0 (or higher). It must explicitly state this in the manual. If it doesn’t then move on to the next model. Often HDMI 2.0 support is limited to a subset of the available connectors.

The highlighted specs, here in the Sony manual, are what you need to look for
Next, the HDMI 2.0 connectors must support 3840×2160 at 60Hz with 4:4:4 chroma. All of those three terms are critically important. If the manual fails to explicitly state support for them then don’t risk buying it. Lower models might only support 4:2:0 or 4:2:2 chroma or 30Hz which all look terrible on a monitor.
Now look at your graphics card specifications. If you’re lucky and it’s a recent card then it’ll support HDMI 2.0 directly and if it’s recent enough to have that support then it’ll almost certainly support 3840×2160 at 60Hz as well. Don’t take it for granted that it’ll do 3840×2160 at 60Hz. You must find positive confirmation somewhere that it will.
I wasn’t lucky. My seven year old ATI 7970 will happily support two 4k monitors but only through the mini-DisplayPort connectors on the back. If, like me, you have a DisplayPort connector then it must support at least version 1.2 and you will need an ‘active’ converter to turn it into HDMI.
The converter I bought from Amazon is this one by a company called Pluggable. They’re available in full-size and mini DisplayPort sizes. It functions as a dongle and doesn’t require its own power supply.
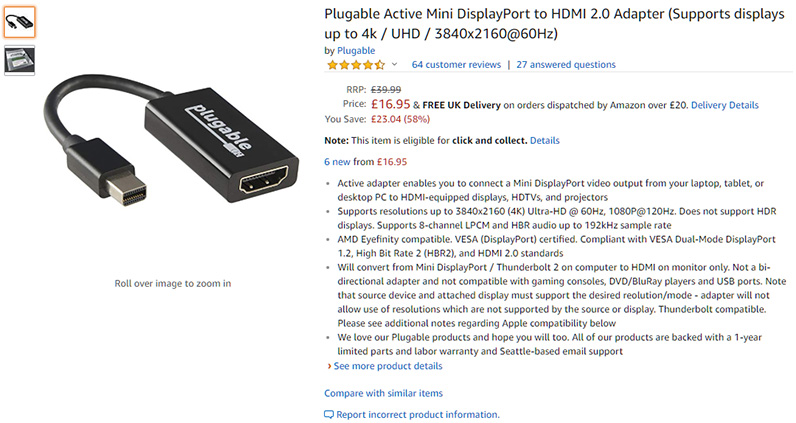
In these times where reviews are bought and paid for by sellers I feel obliged to say I have nothing to do with the Pluggable company. I found this gadget by searching Amazon and paid for it out of my own pocket.
Buy a new HDMI cable
Yes, you’re going to need a new cable. All those guides on the internet that tell you how all HDMI cables are the same were written in the days of low, undemanding data transfer rates.
3840×2160 at 60Hz with 4:4:4 chroma requires a bandwidth of 18Gb/s. I did a quick (too quick) search on Amazon, found a cheap one that stated it would support 4k 60Hz and even mentioned 18Gb/s support. Great, I bought it. Oops. Whilst it was able to show a steady display it also produced ‘sparklies’ – a handful of bright random pixels scattered about the screen.
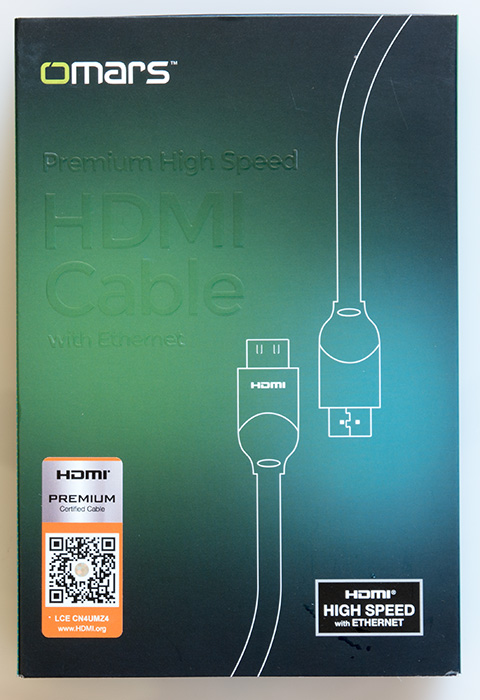
This was when I discovered the HDMI premium certified program. This is where manufacturers get their product tested for compliance at 18Gb/s by the HDMI organisation labs and if it passes then they get to display a unique hologram sticker on their packages to prove it. A mobile app is used to scan the QR code and read the hologram to verify it. Cables with this certificate are not really any more expensive than lesser cables so I bought this one.
I swapped out the sparkly cable with the new one and bingo, all my sparklies are gone and I had a pixel-perfect display. That was a lesson learned the hard way.
Download the 4:4:4 chroma test
The rtings website have produced a test image that proves whether you’re running 4:4:4 chroma or not. I’ve reproduced it here in case the above link goes dead.
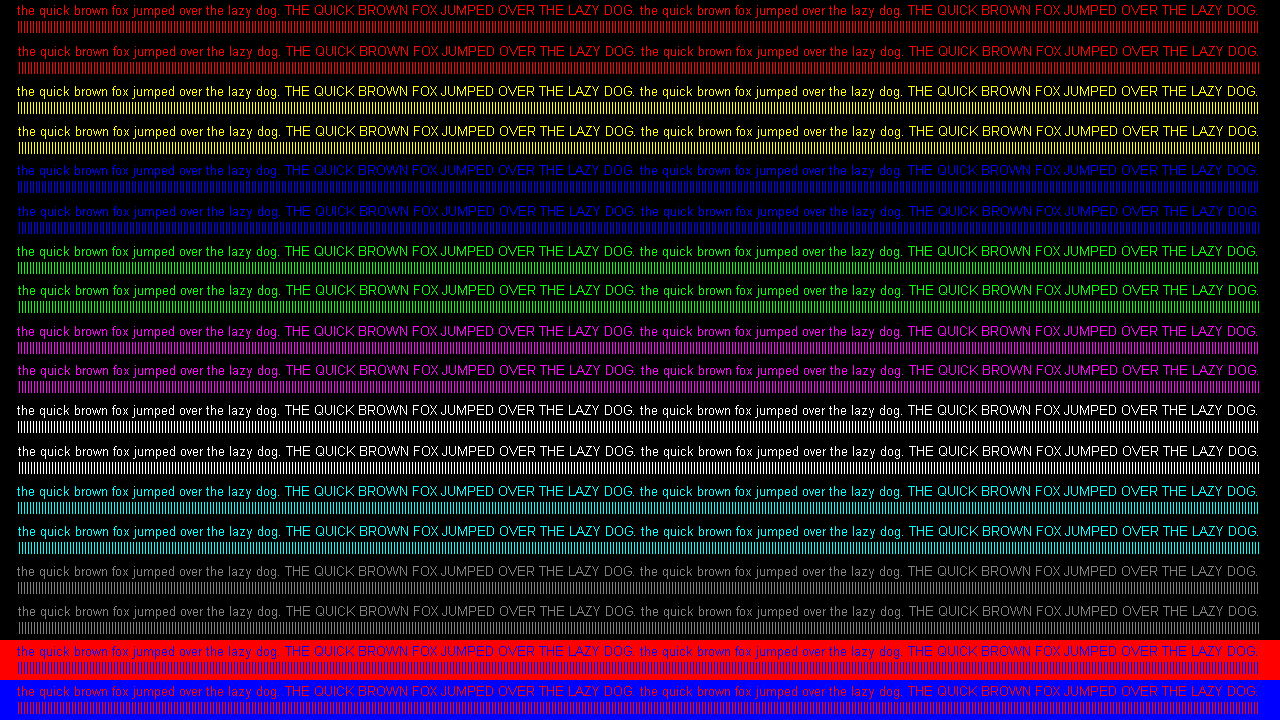
Click the image to download it
Download the image and open it full size, unscaled in an image viewer. Using your current monitor look closely at the red and blue bands on the bottom. Remember how sharp and legible the text appears because you’ll use this image later to satisfy yourself that you’re running 4:4:4 chroma on your TV.
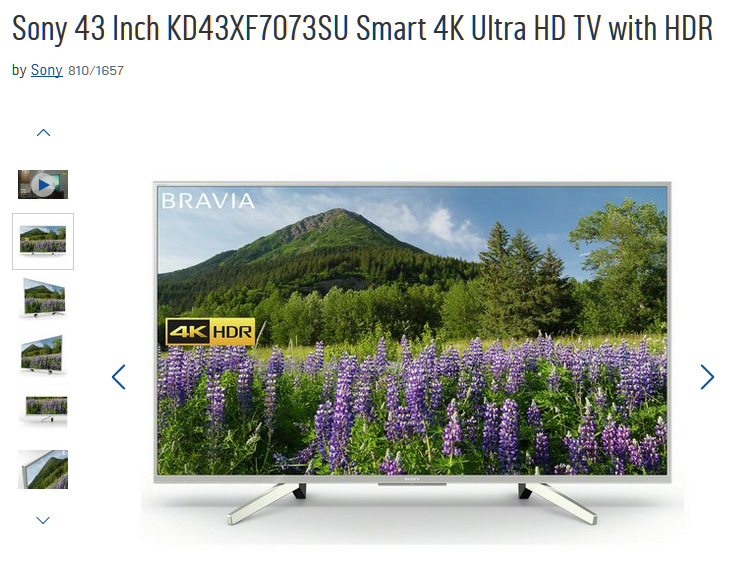
Buy it and set it up
The model I decided on was the Sony KD43XF7073SU. I lurked for a while watching the price fluctuate and then pounced when I saw it for £419 with an additional sale coupon of £30 off and I got it for £389 with free delivery.
It arrived, I hooked it up to the correct HDMI port and switched it on and… it looked terrible! The mouse was so laggy it appeared to be inebriated, text looked ragged, the colours were a mile off. Clearly I had more work to do. Here’s what I had to do to make it work properly.
Firstly, although the screen resolution was being detected as 3840×2160 the mouse lag clearly pointed to a 30Hz refresh rate. I went into the AMD Radeon Settings application and found where you could create a custom resolution. No matter how much I tried it would always complain that 3840×2160, 60Hz was not supported by my monitor. Not good.
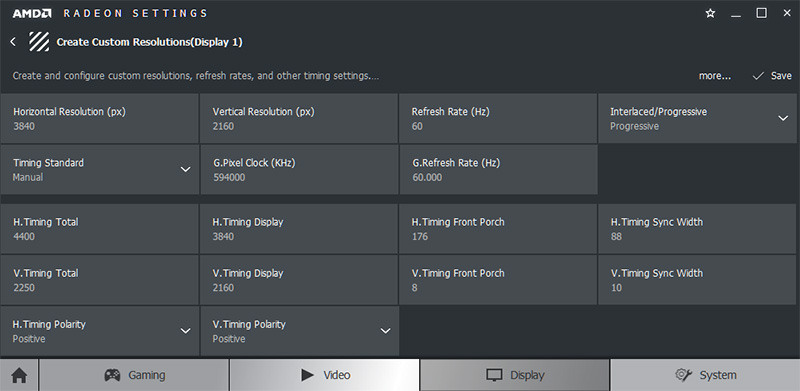
The AMD settings – it displayed 30Hz at first
Googling around I discovered something called Custom Resolution Utility. This seemed to offer a way forward so I ran it, created a 60Hz resolution and moved it to first in the list. Nothing changed except my stress levels increased a notch.
Eventually I solved the problem from Windows by right-clicking on the desktop and selecting Display Settings -> Advanced display settings -> Monitor and then selecting 60Hz from the Screen refresh rate drop-down.
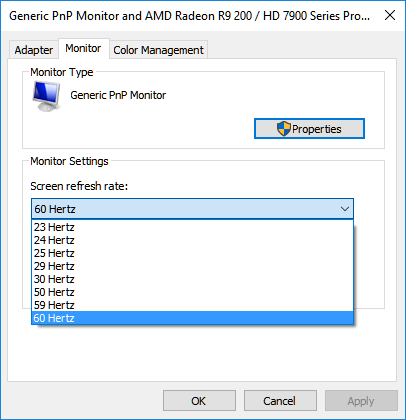
Instantly the display was much better. The mouse lag was gone and the picture was just generally ‘better’. It was now time to move on to the TV settings. This will vary depending on the model that you’ve bought. I’ll show what I did with my Sony and you can apply the principal to the model you’ve bought. I’ll try to photgraph the on-screen display but please excuse the poor quality because cameras are really bad at photographing monitors.
The Sony has a Scene Select option that controls how the picture is filtered and processed before being displayed. It needs to be turned off. In the Sony they call ‘off’ Graphics mode.
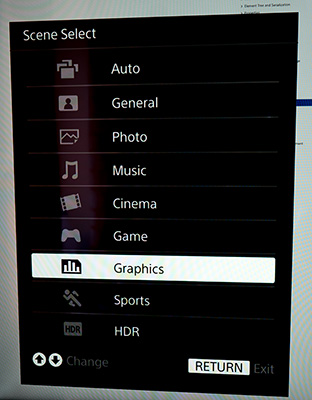
This tells this part of the TV firmware to not interfere with the input signal. Next up are the general picture settings. On the Sony this is called Picture.
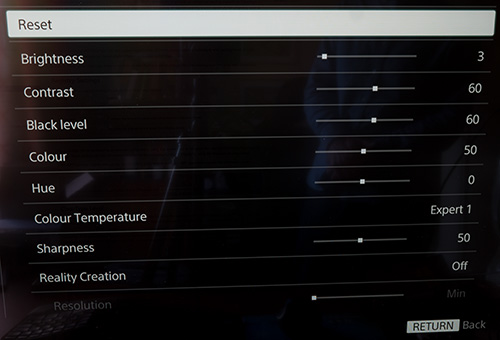
Sharpness must be set to whichever option is ‘off’. On the Sony this is the middle setting of 50. Any less softens the image and any higher sharpens it.
Select a colour temperature that looks most neutral to you. On the Sony this seemed to be Expert1. Reality creation is some kind of Sony feature and should be switched off along with any other such feature that you find.
Contrast and brightness should be set to your taste. Brightness probably refers to the intensity of the LEDs that light the display. On my Sony the IPS panel is edge-lit and increasing the brightness of a dark background can result in internal reflections from the extreme corners of the panel when viewed at a sharp angle. Thankfully the display brightness is so good that I generally operate at between zero and 5 on the brightness scale and never see reflections at the extreme corners.
With the scene and picture settings set up I actually thought I was done but I had a nagging feeling that something wasn’t right because the colours seemed a little ‘off’ in a way that I can best describe as the blues appearing to have too much cyan in them. The 4:4:4 test image looked good but not great. The text just wasn’t as legible as it could be.
Flicking around the menu system I found the crucial setting buried under the Home -> Settings -> System Settings -> Setup -> AV Setup -> HDMI Signal Format option. This was set to Standard by default but must be set to Enhanced to receive the 60Hz 4:4:4 chroma signal. Presumably this is for compatibility with most consumer electronics out there.
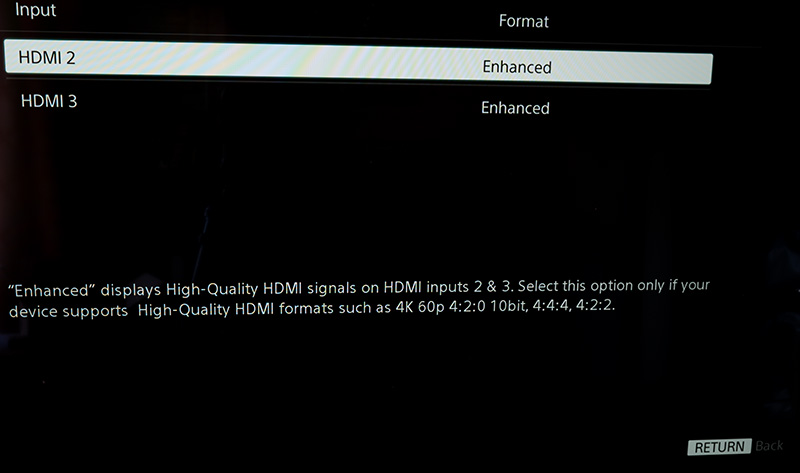
Changing it to Enhanced was like night and day. Suddenly all the iffy colours were perfect and I was genuinely looking at a monitor-quality display (this was where the sparklies showed up as mentioned above – fixed by the Omars brand cable). The 4:4:4 chroma test came up perfect.
There is zero ghosting on the mouse pointer or as windows are dragged around. There is zero image retention if you leave a window in the same place for a while. I cannot perceive any input lag compared to a monitor, but I’ll leave the gamers to pronounce judgement on that one.
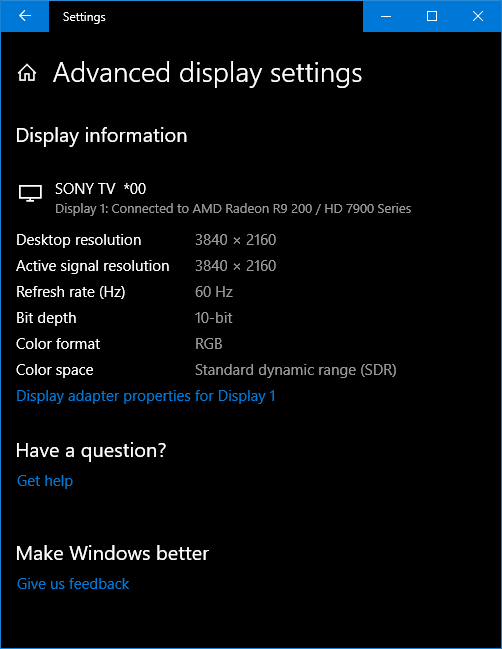
A quick check in the Windows Advanced display settings showed that everything was correct. Don’t get excited about the 10-bit claim. Windows is sending 10-bit to the graphics card but the link to the monitor is 8-bit.
Pixel substructure
Each pixel is made of 3 vertical stripes: Red, Green and Blue. Monitors and some TVs arrange these in the order Red, Green, Blue (RGB). Many TVs reverse the order to Blue, Green, Red (BGR). To find out which one you’ve got you need to display something that’s completely white like most web page backgrounds and then use a magnifying glass or loupe to look very closely at the display. You should be able to see which substructure you have.
![]()
A macro shot of my TV’s BGR subpixel layout
I have BGR, arranged in a rather curious chevron pattern (if anyone knows the reasoning behind that pattern I’d love to hear about it). So why does this matter? Windows and web browsers like Chrome and Firefox display fonts with an anti-aliasing system that smooths out rough edges. Windows calls it ClearType. It works by placing coloured pixels alongside the actual text colour to fool your eye into seeing a smooth transition to the background colour.
On an RGB display the colour chosen will be a shade of red if the coloured pixel is to be placed on the right of the shape being smoothed. On a BGR display it must be a shade of blue. Get it wrong and the text will look blurred in a way that’s difficult to describe. It’s sort of like watching one of those red/green 3D movies of old without the glasses. There’s a misalignment of colour.
Windows cannot detect whether you have a BGR or RGB display so you have to tell it in software. Press the Windows key and type ‘Clear’. The Adjust ClearType Text option should be displayed. Click on it and walk through the five stages of tuning ClearType. I think the first stage is the BGR/RGB test and the others are about getting the weightings right.
Unfortunately ClearType is not universal. I still see the misaligned colours in some old Windows dialog boxes. You have the bizarre state where the window frame is correct but the content isn’t. I tried to photograph the effect for you but unfortunately failed miserably, succeeding only in photographing really bad moire interactions between the camera and the screen. I have not found a way to fix this and to be honest I haven’t put any effort into it because I see these forms very rarely.
Other operating systems, some applications and web browsers will need custom tuning. I’m a heavy user of Ubuntu in a VMWare Player virtual machine and I had to make a change there so it looked right. See this answer for how to do it.
Firefox now looks fine in Ubuntu as do the pages rendered by Chrome. The Chrome address bar and tabs are showing incorrect anti-aliasing but I’m not putting any effort into fixing this because Firefox is my browser of choice in Ubuntu.
The Sublime Text editor in Ubuntu wasn’t picking up the system settings so I had to add the following to the settings to fix it:
"font_options":
[
  "gray_antialias"
],
Verdict
Was it worth it?
Oh yes. My goodness yes. The Bravia IPS panel quality is simply sublime. Photo editing is a joy. Laying out PCBs is so much easier when you can see more of the board and have the schematic adjacent to it. Text and icons are the same size as they were on my 27″ monitor; I simply have so much more available space.
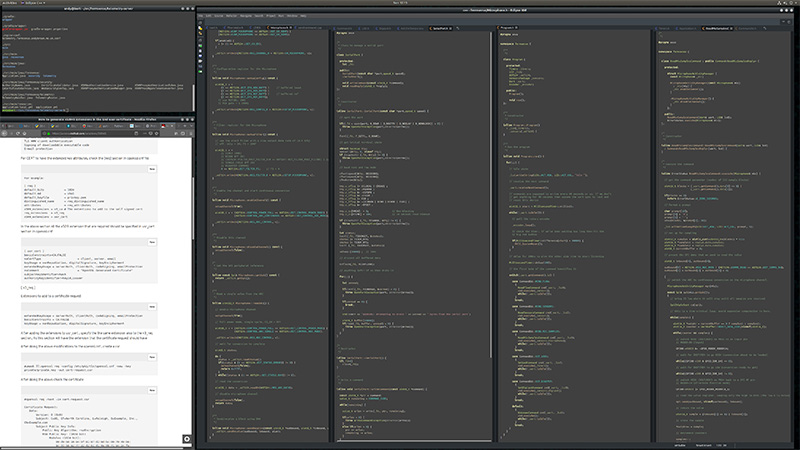
One possible layout for coding
I never thought I’d look at my 27″ monitor and think of it as small.
Drawbacks? Well, I still have to put up with the occasional program that doesn’t understand the BGR pixel substructure. There is no auto-sleep synced to the computer. If I walk away from the computer for lunch or something then I have to use the power button on the remote to turn off the monitor. I find using the remote control to adjust brightness no problem compared to most monitor OSD control buttons.
I hope this article helps anyone that’s considering doing what I’ve done. If you’d like to discuss it some more then feel free to leave a comment below or visit the forum where I’ve started a thread on this subject.
Update January 2020
As part of a larger computer upgrade I have now replaced my ageing but perfectly functional ATI 7970 graphics card with an Nvidia Titan X because I needed the CUDA resources and the 12Gb of graphics memory that comes with it. The Titax X has a native HDMI 2.0 port that allows me to connect my TV directly to the card without an adapter and get 3840x2160p at 60Hz with 4:4:4 chroma. This is good.
However, there’s a problem with the Nvidia HDMI audio drivers that’s been quite well reported on the Nvidia forums. What happens is that when an audio stream starts then some kind of ‘reset’ happens on the display that causes the TV to drop down its black ‘status’ display at the top of the screen that tells you which input is selected, the resolution etc. and it lingers for about 5 seconds. This is really annoying and Nvidia seem to ignore the issue. Threre are a couple of solutions to this issue.
- Never install the Nvidia HDMI audio driver. Don’t worry, the generic windows drivers will work fine. When you install your GeForce drivers make sure you go through the options that let you choose what’s going to be installed.
- Optionally, if you have external speakers connected over USB or something else then use those for all your audio instead.
With the Nvidia audio driver banished from my system, and I’m still using the TV speakers over generic HDMI drivers, then the problem is 80% gone. It will still sometimes happen but it’s now rare enough that I don’t care.