


Process automation: building a process controller
Not a lot of people know this, but I brew my own beer as a hobby; and I’m not talking about the murky coloured astringent tasting dodgy brews of yesteryear. The beer I brew is probably best described as craft ale. I do the whole process, much like a brewery would. I design recipes, crush my own grain, culture yeast, adjust water chemistry and most important of all I control the temperature of the process at every stage from beginning to end. When I get it right, and it took about a year to nail the whole process then the result is a crystal-clear ale that you’d be happy to be served down the pub.
Many parts of the brewing process require you to set and hold the temperature of the soon-to-be-beer at a particular level for a set amount of time. At the beginning of the process there are stages known as the ‘mash’ and the ‘boil’. Both of these stages, the mash in particular, require careful setting and holding of the temperature of the ‘wort’ for a relatively short period of time. ‘Wort’ is the term given to the sugary solution derived from steeped and crushed malt that the yeast ferments to produce beer. There are many odd-sounding terms in brewing, and that’s one of them.
When I’m done boiling, cooling and the yeast has been added then the wort needs to be held within a particular temperature range while the yeast does the good work at the temperature where it works the best. This can take a few weeks and the ideal temperature can vary during this time.
For example, during the first few days the yeast is very busy indeed and produces its own heat while it’s working. This is the time to keep the temperature at the bottom of the working range if you want a clean tasting result, or perhaps slightly higher if you don’t mind the production of the fruity esters that are characteristic of a yeast working at a higher temperature. Later on when the reaction has died down it can help to raise the temperature a few degrees towards the top of the range to encourage the yeast to finish the job and start to drop to the bottom.
Later still, I like to activate just the fridge for about a week and chill the beer down as low as it will go. This sends the yeast into dormancy, clarifying the beer ready for bottling and the secondary fermentation stage.
It’s these parts that I’ve already partially automated and would like to improve upon.
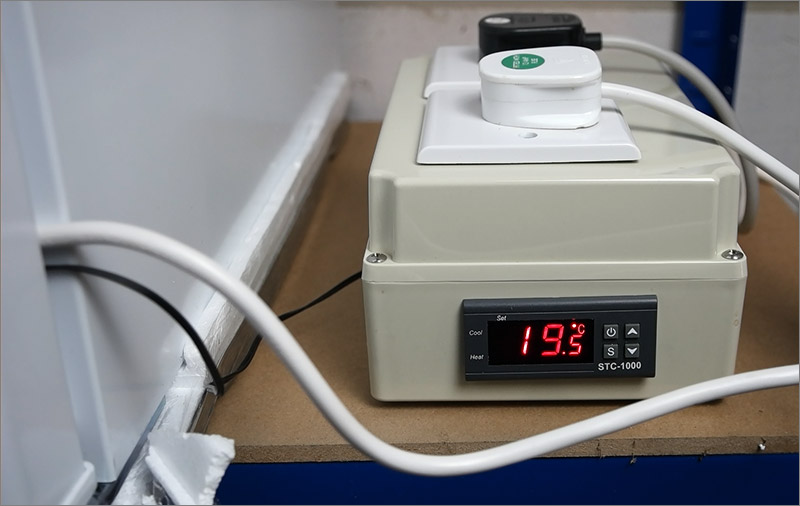
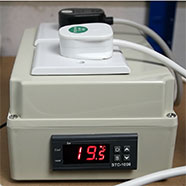
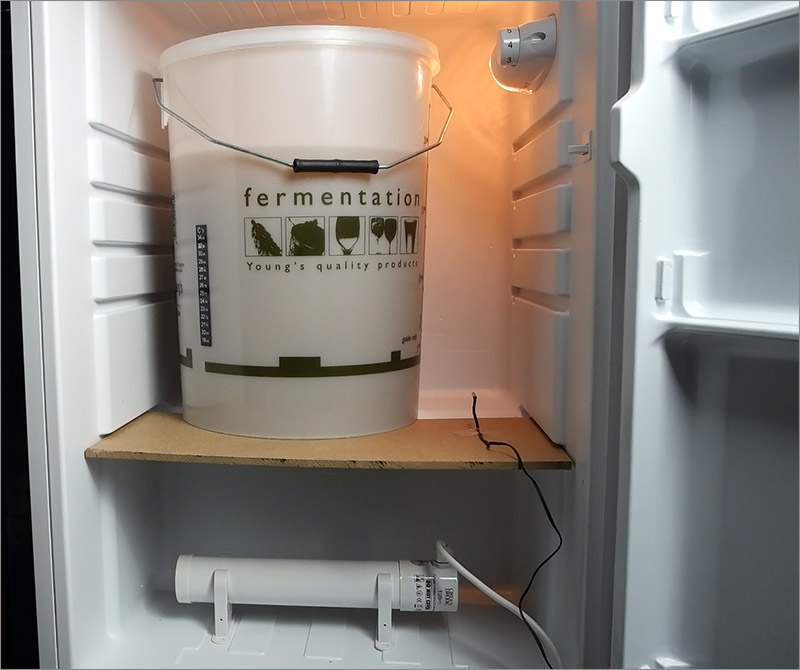
In common with many hobby brewers I’ve got hold of a larder fridge in which to perform my fermentation, and subsequent chilling. The basic idea is that a very simple and cheap on-off controller known as the STC-1000 (in the image above) monitors the temperature via a sensor on a long wire and when it’s too cold it switches on a heater that you supply and conversely when it’s too hot it switches the fridge on.
It’s a very simple device and it has problems, one of which is overshoot and undershoot. Because it’s just relay-based and not a phase-angle controller it cannot vary the temperature of the heater to perform accurate PID operation. It does understand that fridges cannot be rapidly switched and does have a blackout period to protect the compressor but it doesn’t learn the extent of the overshoot and undershoot and compensate for it.
There are other issues. The STC-1000 is cheap and originates from China. The relays, upon which you are totally reliant, are an unknown brand supposedly rated at 10A. When a Chinese component says it’s rated at 10A then you’d better test and de-rate accordingly. The temperature probe is inaccurate. I have a calibrated digital thermometer that showed my STC-1000 to be out by 1.5°C. It has a very dumb single-point calibration offset that you can apply so I can adjust for that but really, I need to improve on this box.
Improving the brew fridge controller
A few people have already tackled this. Notably there’s a device called the BrewPi that uses a Raspberry Pi to create an entirely embedded solution. I tried it some time ago by following the DIY instructions that you can find here. It worked, but was a little messy and I thought the Web UI was a bit too ‘home made’. Their new completely embedded Spark V2 edition does look very nice though. Not convinced by the DIY Arduino solution and not wanting to fork out for the Spark V2, I went back to my STC-1000.
I started to have ideas of my own. A relative of mine is a professional brewer, founder of the Robin Hood Brewery in Nottingham, and my brother-in-law, a retired industrial electrician, set up his semi-automated brewery. We got to talking about how it’s done in the real world where a failed batch means significant financial loss. We talked about the PLC controllers he’d fitted and the network of platinum RTD temperature sensors that fed into them and I thought that the techniques and at least some of the technology could be adapted by the home brewer.
My plan then, is to repurpose a PC that I have just sitting around here doing nothing into a process automation controller that I can control over the internet using a secure Android app.
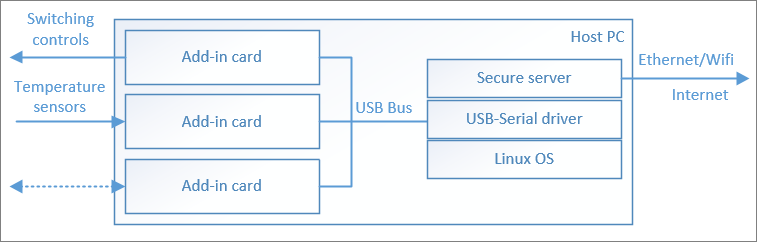
The PC will host add-in boards that I create and connect to it internally by the USB bus. The add-in boards will be detected and managed by the linux operating system. I will create the layers of firmware and software that enable me to control it remotely using an app. I like Android apps for this purpose because I can write them in a language that I know and use daily in my professional life — sorry but I don’t know Javascript very well so there will be no ‘web’ UI.
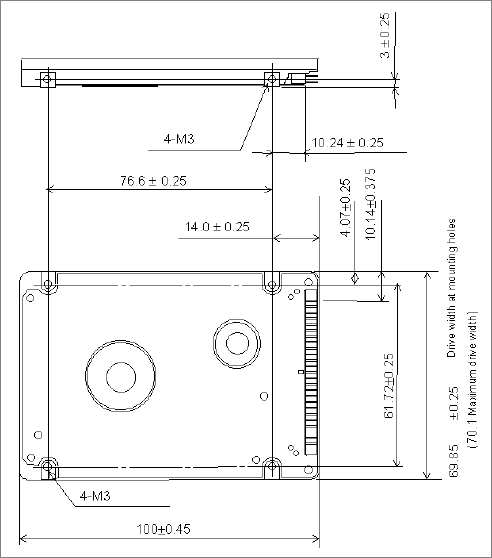
Physically, the add-in boards will be designed to fit the format of an internal hard disk so that they can be screwed into a hard drive bay caddy.
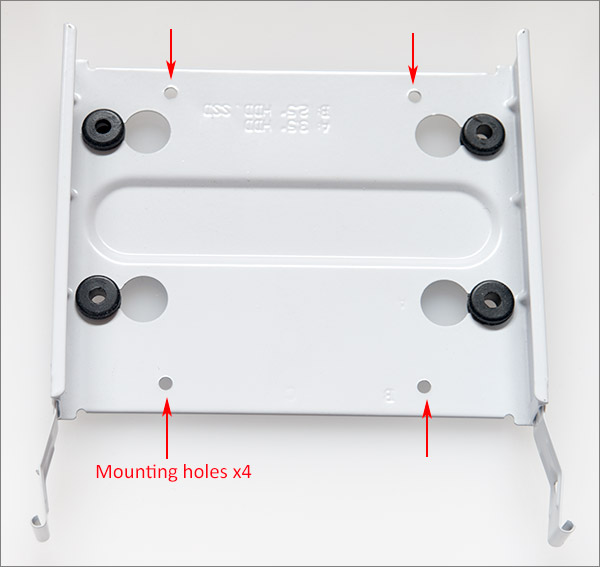
The screw holes are the standard spacing for a 2.5″ drive, as show in the CAD diagram. I chose this footprint over the larger one for 3.5″ drives because it fits nicely within the 100mm square PCB size that is so economical to have made in China.
The mounted boards can then be slid in and out of the bays in my PC case. There are so many bays in this case that I’ll have no problems fitting the boards inside.
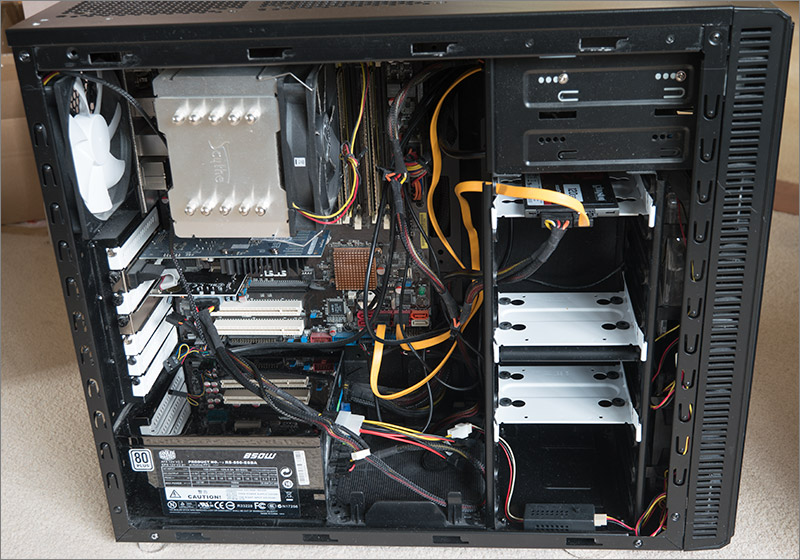
That’s an Asus P5Q-Pro in there supporting my old QX9650 CPU. That was quite the CPU back in the day and can consume a lot of power if pushed hard. I’ve measured this PC as drawing around 65W of power when idling running Linux. Not too bad I guess. An Intel PC is never really going to fall into the ‘low power’ bracket.
I’ve bought a cheap PCIe expansion card that has internal USB connectors that I will use to hook up the boards. There are plenty of those to choose from, for example this one by CSL.
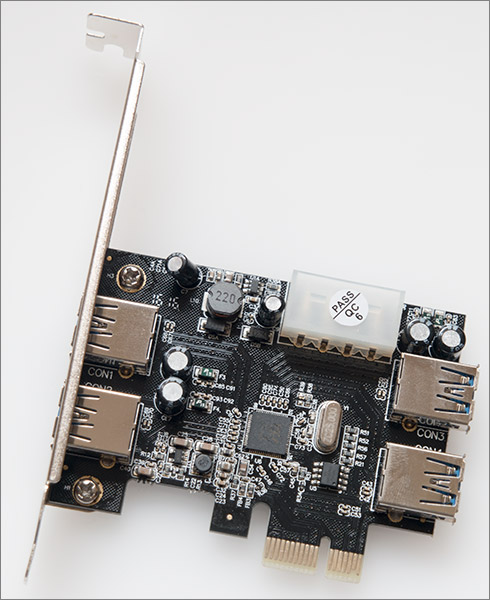
This is a USB 3.0 card based on the VLI VL806 chipset that I’ll be using in USB 2.0 mode. I’m hoping that Linux will be able to detect it as I’ve heard horror stories about USB 3.0 support on Linux that I hope are a thing of the past now. In any case, whichever card I choose it must be a root controller capable of supplying the full 500mA current to connected devices. Bus-powered USB 2.0 hubs will not work with the system I’m planning because of the 100mA per-device limit.
Boards to build
I know for sure that I’ll need a board to perform the switching and PID tasks. It’ll need to have relays for direct switching and a triac for phase-angle control. I’ll need to modify my case to allow mains cabling to enter safely and connect to the board.
I’ll need a temperature sensor board and, referring back to the professional system, I want it to be based on platinum RTD sensors. RTDs are the industry standard for this application because of their high precision, low noise and high linearity. Good RTD sensors are expensive and so is the circuitry required to carry though the accuracy of the RTD all the way to the digital conversion. I think it’s worth it though as everything else you do depends entirely upon being able to believe the temperature readings that you’re getting.
Those two boards should be enough to get going with others to come later. I could add a board to display status readings on a display mounted in a PC front drive bay. I could do a cheaper temperature sensor board using the DS18B20 sensors to sense non-critical parts such as the local ambient temperature. There are many possibilities.
That’s all for now. I’m off to go and design some boards and install the latest Ubuntu on an SSD in my old PC to bring it back to life. More articles will be posted here as I make progress with this project.