


An acrylic case for Nanocounter
You may have already read my writeup about my first experience with laser cutting and the case that I produced for my reflow oven controller. If not then you can always get up to speed by clicking here.
Creating a design for laser cutting involves laying out the different pieces into a template supplied by the manufacturer, who in my case was Razorlab in the UK. Three increasing sizes of template are offered which they call P1, P2 and P3.
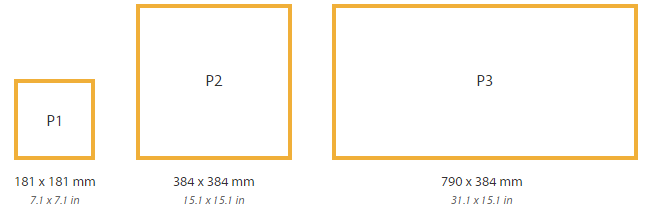
I fitted all my pieces into the P2 template and when I’d finished I had some space left over and rather than let it go to waste I decided to add a design for a case for my Nanocounter frequency counter.
It’s not completely free to use up the additional space because with a laser cut design you pay a fixed fee for the acrylic sheet and then a variable fee based on how much laser time you use up. The more cutting you do, the more it will cost.
Design choices
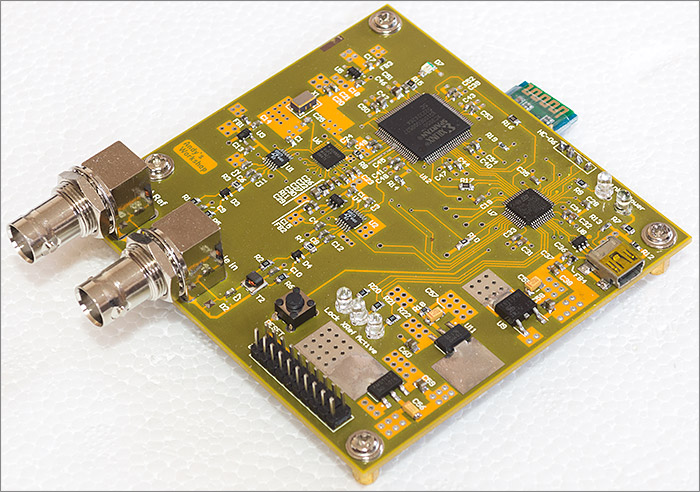
My main concern with the case design was how to deal with the force exerted by repeated connection and disconnection of cables from the BNC connectors. With just the bare PCB I can grip the back of the BNC connector housing while manipulating the connector thereby preventing force being exerted on the PCB through the BNC connector solder joints.
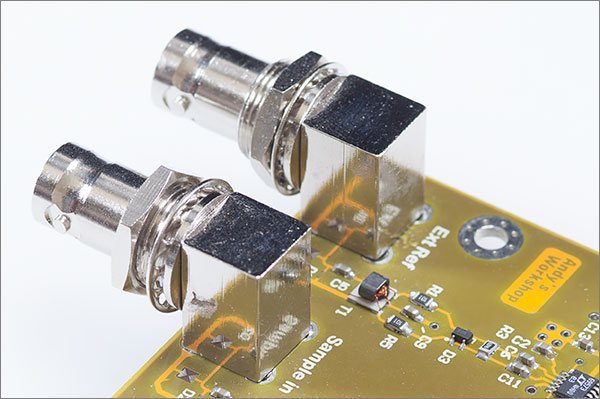
If I were to make a fully enclosed case then the BNC connectors would be attached to the acrylic and I would have to grip the case to remove a cable. Acrylic is prone to cracking under force so I thought this to be a bad plan. That, and the fact that I’d specified 5mm acrylic which is a little too thick to accept the washer that’s supposed to screw on to the BNC connector and hold it to the front panel.
I could have gone for a hybrid design using acrylic for most of the case and a PCB as the front panel with some kind of slot arrangement to hold it in place. This was an attractive idea, and one that I may yet use in the future, but for this design I decided to keep it simple.
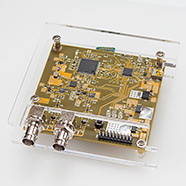
I decided on a simple ‘shield’ type of case that’s basically just two pieces of acrylic for the top and bottom leaving the board open to the elements at the sides. The two pieces are lifted clear of the board with brass spacers and fixed in place with M3 screws.
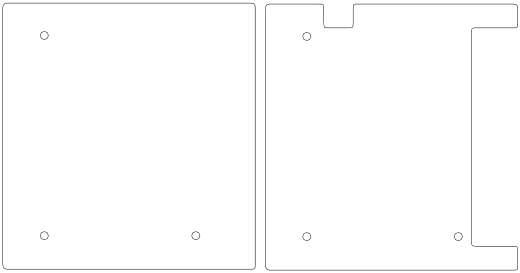
That’s what the design looks like in Inkscape. The large cutout leaves space for the BNC connectors on the left and the SWD programming and debug connector on the right. The smaller cutout is to allow access to the USB connector. The two pieces of acrylic are larger than the PCB by about 10mm on each side.
There isn’t a fourth hole on the top piece because of the aperture that gives access to the SWD connector. With the benefit of hindsight it was a mistake to omit the fourth hole on the bottom piece. There’s no reason why it should not have been included.
Although far from a perfect case design, this does satisfy my main requirements of allowing me to easily pick it up and move it without risking a static discharge into the PCB and also to eliminate the risk of accidentally dropping something on to it and to give it some protection if I accidentally drop it.
Assembly
Here’s the individual pieces as they arrived from Razorlab after I’d removed the protective coating. Also shown are the fittings from my parts bin that are used to hold it together.
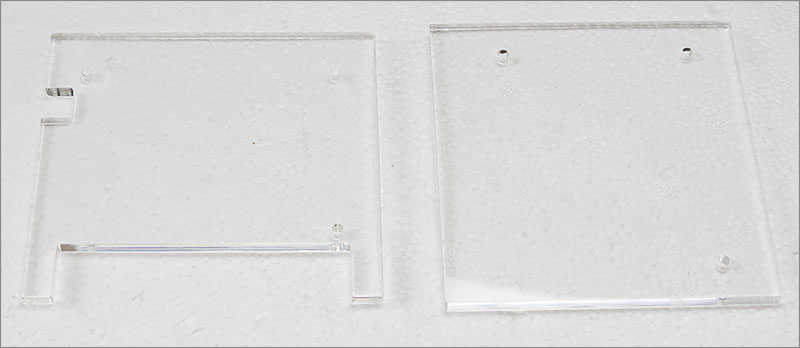

The brass spacers are 8mm M3. The short screws are the standard 6mm M3 computer case screws typically found holding disk drives to cases. The long screws are 20mm M3 hex bolts that I salvaged from a dead hard drive before binning it. The idea is that there will be spacers above and below the board. The long screws will be inserted from the bottom, passing through the base, the lower spacer and the board before stopping a little way into the top spacer. The short screws will be inserted into the top and will screw down just enough to grab the upper spacers making a snug fit.
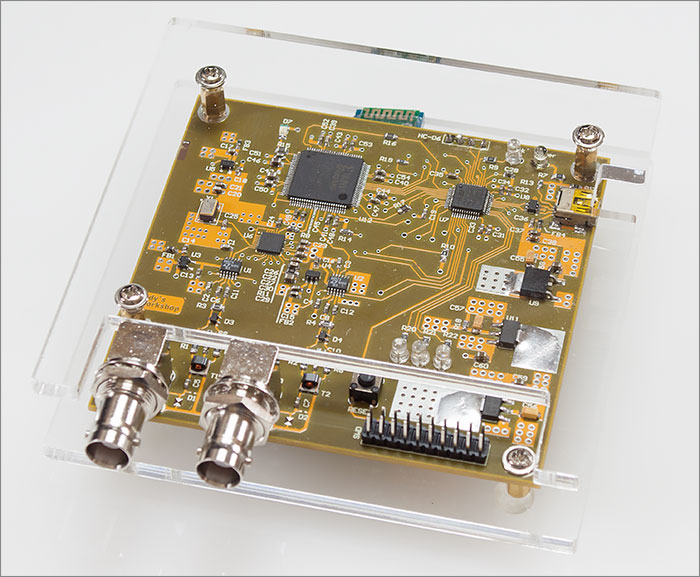
The assembled unit
Here it is and it looks great to me. A set of four clear 3M self-adhesive ‘bumpons’ are used as feet to finish it off. I think it will certainly do the job of protecting the board from accidental damage and should serve me for years to come.
Download the design
Here’s a link to the Inkscape design if you want to build your own. This design also includes the case for the reflow oven. The nanocounter design is too large to squeeze into the smaller P1 template so it makes sense to use the rest of the P2 sized material for something.
If you’ve enjoyed this article then please do take a look at the rest of my website because there are many others that may appeal to you.