An ATtiny85 development environment
This article will help you to set up a low-cost development environment for programming and testing the ATtiny 85 MCU. The same principles apply to any other member of the ATtiny family that can run free of any external components.
Parts List
| Component | Supplier | Price (GBP) |
|---|---|---|
| Breadboard | ebay | 0.99 |
| 16 (at least) pin ZIF socket | ebay | 3.00 |
| USB ISP | ebay | 7.00 |
| Jumper wires (x100) | ebay | 4.00 |
| ATtiny85-20PU | Mouser electronics | 1.28 |
| Total cost (GBP) | 16.27 (approx) | |
Hardware

The above image shows the very basic hardware setup that is needed to develop and test on an ATtiny 85 MCU. The ISP programmer is hooked up using jumper wires to the top section of the ZIF socket leaving the bottom section free for wiring up your test circuit. When you want to program the MCU, insert it into the top of the socket and when you want to test it, insert it into the lower section of the socket. This procedure is simple and fast, allowing you to operate a rapid development cycle.
Wiring up the ISP
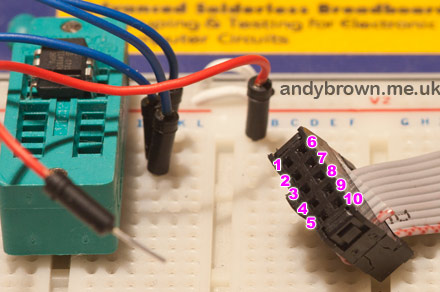
Click image to magnify it.
The ISP comes with a lead that has a female 10 pin socket on each end. Here’s the pinout, referring to the above photograph.

For the actual wiring I use ordinary cheap jumpers inserted into the breadboard at one end and the female socket connectors at the other. I find that these grip well enough to be secure during use.
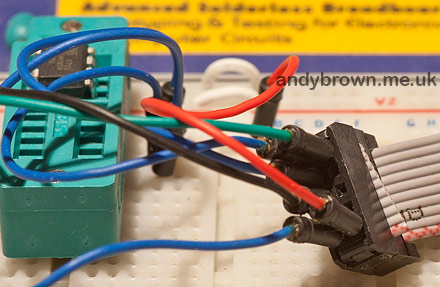
Click image to magnify it.
The photograph above shows how I wire mine up to the top section of the ZIF socket
Software
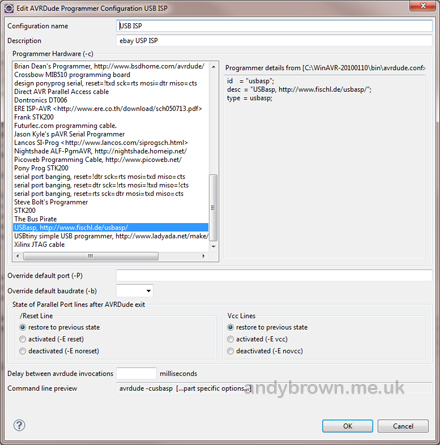
AVRDude has built-in support for this ISP but you need to tell your development environment to use it. If you use Eclipse then these are the steps that you need to take.
Go to Window->Preferences then select AVR->AVRDude from the options on the left of the form. Click the Add… button to create a new configuration. This is the one you need to choose from the form that lists all the possible AVRDude configurations.
Click image to magnify it.
Give it a suitable name and description and then click out of the Window->Preferences form.
All that remains now is for you to right click on your project, select Properties and then the AVR->AVRDude option. You can now choose the programmer configuration that you just created.
Workflow
Of course your workflow is up to you but I thought I’d share mine here in case you’d like to follow it.
- USBasp plugged in to computer, Vcc lead disconnected, ATtiny in the top section of the ZIF socket.
- Write code, make changes to circuit hooked up to lower section of ZIF socket.
- Connect Vcc lead to pin 8 of ATtiny via ZIF socket.
- Upload program.
- Disconnect Vcc lead.
- Move ATtiny to lower section of socket.
- Power up the test circuit and run tests.
- Power down test circuit, move ATtiny to top section of ZIF socket.
- Go to (2).


