


Your first AVR project in Eclipse
So you’ve read my blog post Setting up Eclipse for AVR projects and now you want to write some code but you’re somewhat bewildered by all the Eclipse options.
Well not to worry, I’ll walk you through your first project step-by-step. We’ll go ahead and recreate the infamous Arduino ‘blink’ example that simply flashes the LED that’s attached to digital pin 13.
By the time you’ve run through this tutorial you will know how to create projects, add C++ files to your project, build it and upload it to your Arduino. Even more importantly I will show you how to use all the convenient functions of the Arduino library such as digitalWrite, digitalRead and the Serial class.
Prerequisites
You need to install my compiled Arduino libraries for Eclipse users. You can get them here, all nicely packaged with a Windows installer.
Create a new project
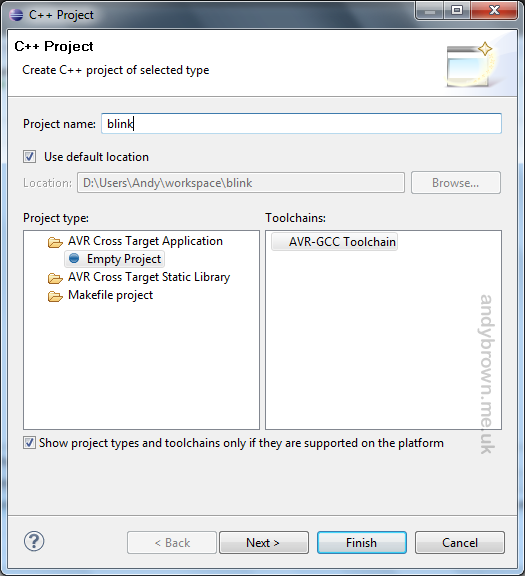
Fire up Eclipse and Choose File->New->C++ project. You will get a form like this one:
Click image to magnify it.
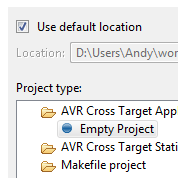
Enter the project name, ‘blink’ into the top field, ensure that the project type and toolchain fields are selected as in the above image and click Next.
Click image to magnify it.
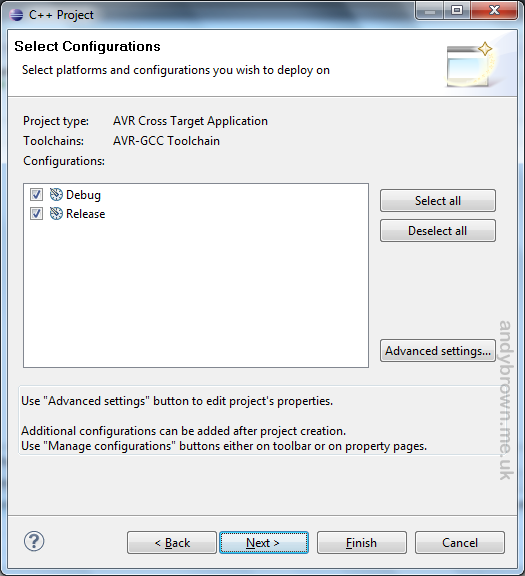
This Wizard screen allows you to change the project configurations. Eclipse allows you to maintain independent build settings for different named configurations. By default you get ‘Debug’ and ‘Release’ settings. These are appropriate for projects that target desktop computers but have no relevance for AVR programming. Leave them as-is for now because we will make some suitable changes later.
Click image to magnify it.
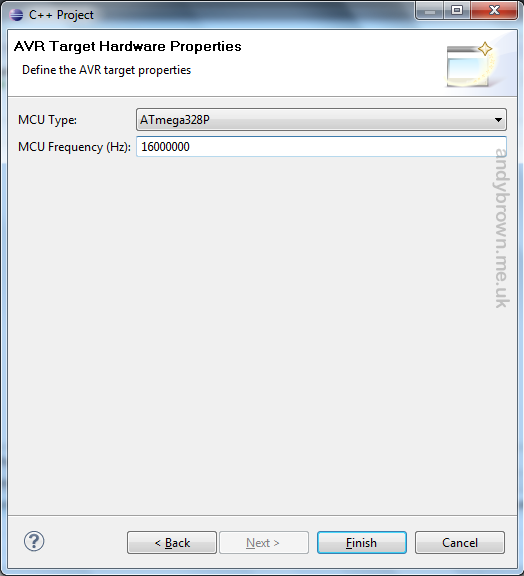
Here we need to make some changes because the selected micro-controller is not the one on-board the Arduino. I’m going to assume that you’re using a Duemilanova or Uno board with an ATmega328P. Choose the MCU type from the drop-down and set the speed to 16000000 (be careful to get 6 zeros). Click Finish and Eclipse will create your project.
Build configurations
This step is optional but you really should get used to doing it because your project will be a lot cleaner and extendible should you decide to port to another AVR MCU.
Select the Project->Build Configurations->Manage menu item. You should get the following screen:
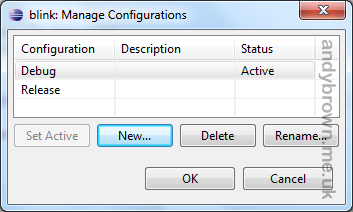
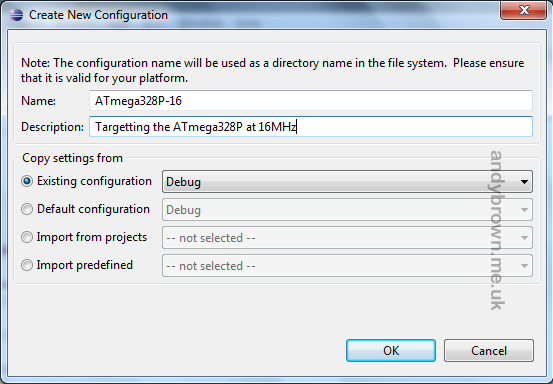
Click on the New button. You will get the following screen. Fill in the fields as in my example.
Click image to magnify it.
I am using the build configuration name to identify the MCU and the frequency that I will be targeting with this build.
Back at the Manage Configurations form, delete both the Debug and Release configurations because they are no longer needed. When you’re done, come out of the form and back to the Eclipse workspace.
Arduino library settings
Navigate to this blog post and follow the directions for setting up the compiler and linker settings. When you’re done, come back here.
Compiler and linker optimal settings
Navigate to this blog post and make the changes to the project settings that I describe. Doing this ensures that you get the best possible code generation. Come back here when you’re done.
Additional project settings
We need to make a few more small changes to the project settings to ensure that AVRDude knows which device configuration to use, and so that your project actually outputs a .hex file to upload because by default it will not do that important step.
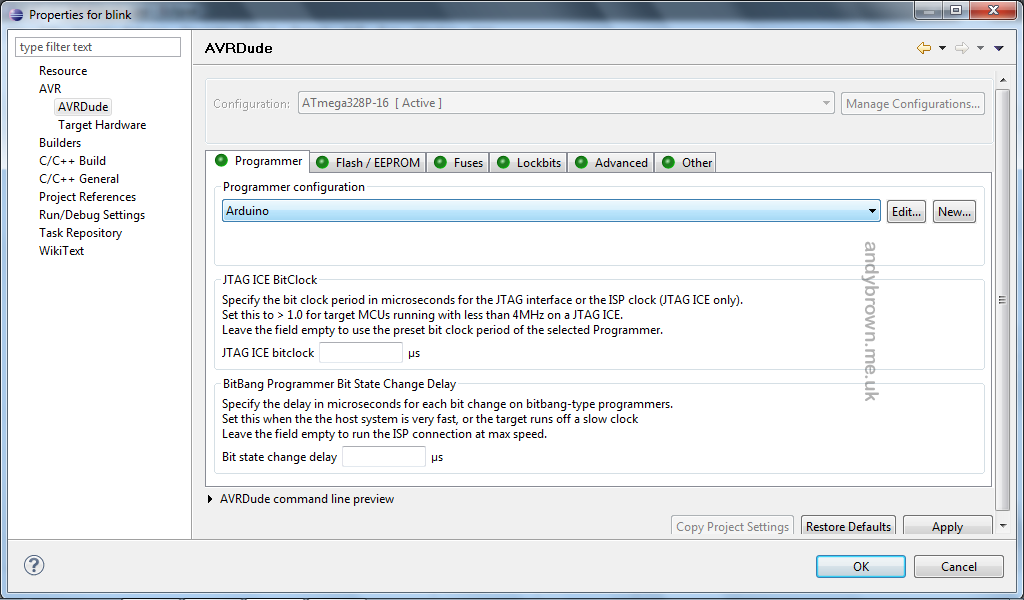
Right-click on the project name in the Project Explorer and select Properties. Select AVR->AVRDude from the menu on the left. You will get a screen like this one.
Click image to magnify it.
Ensure that Arduino is selected in the dropdown menu. If you do not have an Arduino option in that menu then you have not followed the instructions in my blog post Setting up Eclipse for AVR projects.
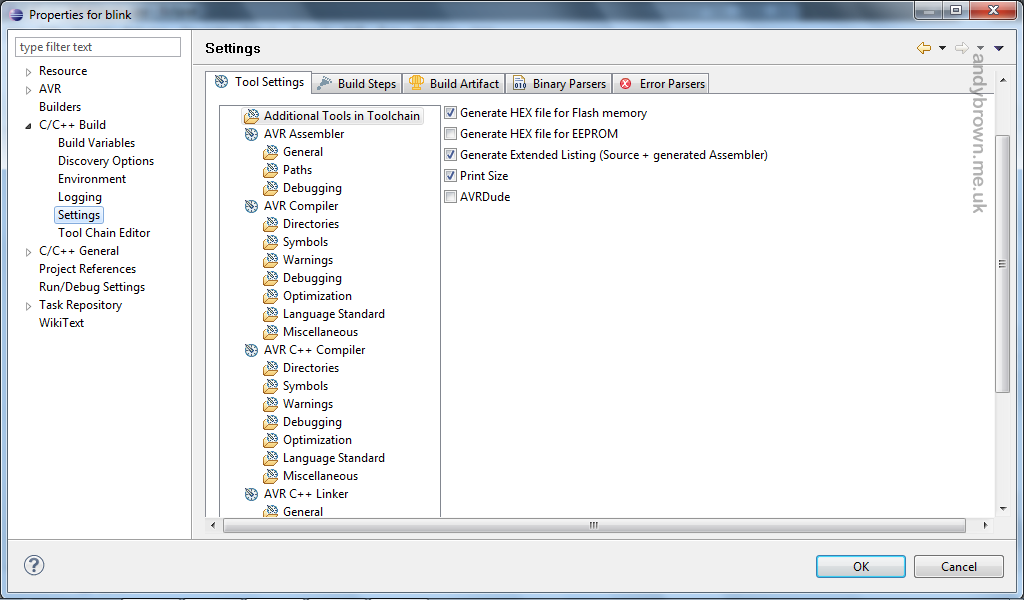
Now select C/C++ Build from the menu on the left. The panel should default to the Additional Tools in in Toolchain options shown below.
Click image to magnify it.
Ensure that the “Generate HEX file for Flash memory” button is checked.
The Project Explorer
The Project Explorer on the left is the main navigation window for your project files. If you have a play around with it you’ll see that right away Eclipse has gone off and discovered the system include files and made them available for browsing in the project explorer.
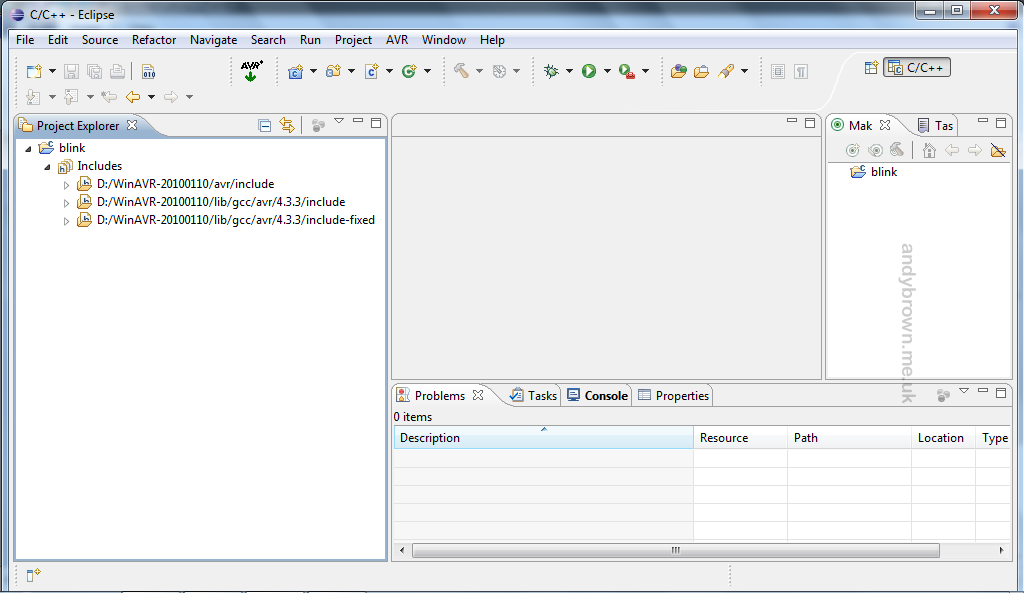
Click image to magnify it.
Add a new source file
We need to add a C++ source file where we will write the code to blink the LED. From the main Eclipse window select File->New->Source File. You will get this form:

Click image to magnify it.
Fill in the fields to create a file called ‘main.cpp’ in the ‘blink’ folder and hit OK. Eclipse will create the file and open it for you, ready for editing.
main.cpp
Here is the source code to our little example, go ahead and copy it from this page into your main.cpp file and then save it.
 /*
 * main.cpp
 *
 *  Created on: 17 Oct 2010
 *      Author: Andy
 */

#include <wiring.h>

extern "C" void __cxa_pure_virtual() {
  for(;;);
}

int main(void) {
  init();
  setup();

  for(;;)
    loop();

  return 0; // not reached
}

void setup() {
// setup pins

  pinMode(13,OUTPUT);
}

void loop() {
  digitalWrite(13,HIGH);
  delay(1000);
  digitalWrite(13,LOW);
  delay(1000);
}
Let’s walk through this short code fragment to see what’s going on.
#include <wiring.h>
wiring.h is a header file in the Arduino library. It contains the definitions for pinMode, digitalRead and digitalWrite. If we didn’t include this file then those useful functions would not be available to us.
extern "C" void __cxa_pure_virtual() {
  for(;;);
}
This somewhat obscure piece of code is just boilerplate stuff. You don’t need to know what it’s doing but you do need to include it exactly once per AVR project that you create. For those that really must know, this is the function that will get called if you screw up and call a virtual function at a point in the code where the virtual function table has not yet been created, such as in a constructor. Since this is a ‘hard’ error that cannot be recovered from it is OK to just go into an infinite loop awaiting a reset.
int main(void) {
  init();
  setup();

  for(;;)
    loop();

  return 0; // not reached
}
The main function is the entry point to every C++ program. If you’ve only been using the Arduino IDE up until now then you won’t have seen it because the IDE hides it by including it in the library code. If you delve into the library source code you can find it and you’ll discover that it looks exactly like this.
init() can be found in the wiring.c library file and is responsible for setting up the interrupt that maintains the timer. Fail to call this and timing functions such as millis() will always return zero.
You are expected to supply implementations of setup() and loop(). No doubt you are already used to this. I won’t bother explaining what setup() and loop() actually do since they are about as basic as they could possibly be.
Build it
Select the Project->Build Project menu item or just press Ctrl-B. If all is well then the you will get lots of feedback in the Console window down at the bottom of the workspace. Here’s what I get when I build it:
**** Build of configuration ATmega328P-16 for project blink **** make all Building file: ../main.cpp Invoking: AVR C++ Compiler avr-g++ -I"D:Program FilesArduino Libraries�020stdinclude" -Wall -g2 -gstabs -O0 -fpack-struct -fshort-enums -funsigned-char -funsigned-bitfields -fno-exceptions -mmcu=atmega328p -DF_CPU=16000000UL -MMD -MP -MF"main.d" -MT"main.d" -c -o"main.o" "../main.cpp" Finished building: ../main.cpp Building target: blink.elf Invoking: AVR C++ Linker avr-g++ -Wl,-Map,blink.map,--cref -L"D:Program FilesArduino Libraries�020stdlib" -mmcu=atmega328p -o"blink.elf" ./main.o -lard_0020_atmega328P_16 Finished building target: blink.elf Invoking: AVR Create Extended Listing avr-objdump -h -S blink.elf >"blink.lss" Finished building: blink.lss Invoking: Print Size avr-size --format=avr --mcu=atmega328p blink.elf AVR Memory Usage ---------------- Device: atmega328p Program: 1212 bytes (3.7% Full) (.text + .data + .bootloader) Data: 9 bytes (0.4% Full) (.data + .bss + .noinit) Finished building: sizedummy
Any errors will be reported in the console and Eclipse will helpfully place a red cross icon to the left of the offending line. It will also place a red-cross over the name of the file in project explorer.
Upload it to your Arduino
After your successful build you need to upload it to your Arduino for testing. To do this, select the AVR->Upload Project to Target Device menu option. Watch the console for feedback as AVRDude performs the upload.
Download the project
If you’re having problems following the steps above then you can download this project from the downloads page. It comes with a Windows installer for easy installation and removal.