• Welcome to Andy's Workshop Forums. Please login or sign up.
 
April 26, 2024, 05:44:39 pm

News:

SMF - Just Installed!


Show posts

This section allows you to view all posts made by this member. Note that you can only see posts made in areas you currently have access to.

Messages - Andy Brown

106
Quote from: JohnBurton on April 13, 2016, 03:13:11 am
I found what the problem was, I had connected up the thermocouple chip to my microcontroller wrongly. Frankly I don't understand how it was working at all.

I'm finding that I have to turn the oven on and off fairly frequently to maintain accurate temperature control. For example making a decision to turn it on or off every second.  I worry that the fan and heater are going to be damaged by doing this several hundred times over the space of making a single PCB.
Has this been a problem?


Hi John, my controller can adjust the duty cycle to a new percentage at an interval of 300ms. Are you pulsing on/off instead of dimming with a triac? You get much better control with dimming and the higher update frequency helps keep it on track with small nudges in the right direction.

107
Quote from: Chris on April 11, 2016, 04:53:14 pm
Hi all,

I lucked into a Z800 with a gen 2 motherboard and the proprietary 850w power supply. I'd like to put a modern video card into it, but I'm wary about the power consumption. Has anyone had any luck using their z800 with a new Radeon R9-3xx series? I see that a few people have posted using the 290 series - did you find that there was any instability playing modern fps games? (I'm thinking of things like R6 Siege).

Thanks!


Hi Chris, check out the new post in the comments section from user "ujt 80".
108
That's strange. I wonder if it's one of your peripheral drivers causing the resets. There's often a clue in the humble event viewer when you get a bsod but it's too late now you've reverted back. I'm using Windows 10 with complete stability and Windows 8.1 before that.

The only problem I had was with Samsung's fancy SSD drivers that I had to remove but that was back on 8.1. I also have occasional issues with the crappy AMD drivers for my 7970 taking ages to boot and sometimes Windows has to step in and recover the graphics driver but it's rare and doesn't cause a crash. I think upgrade day for my 7970 may come soon. It can't play high-bitrate (16Mb+) 1080p video without stuttering when even the built-in graphics on the wife's i5 can handle it.
109
I finally got around to designing and building a laser-cut acrylic case for my android/bluetooth reflow controller. You can read all about it in this blog article.


This is my first attempt at being a hobby maker and I'm quite pleased with the outcome. I'll certainly be doing more of this in the future.
110
I've now released version 2 of the Android app that fixes a few bugs and adds some new features. Anyone who's installed it should receive an update notification from the Play Store. The list of new features and bug fixes can be found here on Github.
111
In general if you have a byte-oriented stream protocol and you want to encode metadata within it then you select a byte to use as a control byte and use the next byte as an instruction as to what to do. For example, you might select 0xFF as the control byte and then use the next byte for example as 0=start, 1=stop, 2=0xFF. Then if a receiver joins the stream at any point and the first byte they read is 0, 1 or 2 they discard it (because it's ambiguous) and start reading at the next byte.

I'm unsure if that's what you were asking for. You also mentioned circular buffers but I can't relate start/stop codes to that because circular buffers normally use offsets or pointers as the read/write position indicators.

Quote
I have a seconds question which would be why the reflow project use  eeprom_write_ instead of  eeprom_update_?https://github.com/andysworkshop/awreflow2/blob/master/atmega8l/Eeprom.h


No reason. Both calls do the job. If you anticipate getting near the 100000 write cycle level and you might be writing the same data as the cell already contains then update is the better choice.
112
I don't know about the chassis headers because my case fans are connected through Nanoxia's own external controller card to a molex  connector on the PSU.

Are there any clues in the programs that can see the fans as to which smbus chip they are connected to?
113
I've attached a copy of libintl-8.dll from the mingw distribution. Can you check if this works? I'm interested if there are any transient dependencies (libiconv2.dll sometimes comes up).
114
Anyone who's not already selected a heatsink/fan for their Z800 might like to take a look at this intel document. The tables from section 5.1 are particularly relevant:

115
Just a quick pointer for people monitoring this thread that I've posted a guide to setting up SpeedFan on the Z800 to automatically ramp up the CPU fan speeds when the core temperatures get hot.
116
A few people have mentioned, both here in the forum and in the comments accompanying the Z800 hack article, that they're having trouble getting their CPU fans to ramp up from the minimum speed and are therefore seeing some alarming core temperatures when the CPU is under load.

The key to fixing this is the SpeedFan utility but setting it up for use with the Z800 is not at all obvious.

Here's a step by step guide to how to do it. This guide is based on my dual X5680 board, you can easily adapt this to a single socket or quad-core configuration.


Launch SpeedFan and select the Configure button. You'll get a row of tabs.

Select the Fan Control tab and create profiles that look like this:


To create a profile, click the Add button and give it a name. I used 'CPU0' and 'CPU1'. Check the Controlled speed box and select Pwm1 from ADT7490.... Make sure you select MAX of speeds because we're going to add a group of sensors to monitor (the other option will add all the temperatures together with the net effect of maxing your fan all the time). In the Temperatures box click Add and repeatedly add each core for CPU0.

If you have two CPUs installed then repeat the process for CPU1. All the information you need should be in this screenshot:


Now go to the Advanced tab and select the ADT7490... option from the Chip dropdown. The important entries are PWM 1 mode and PWM 2 mode. These will be set to Auto on PECI0 and Auto on PECI1. Change them to Manually controlled as shown here:


Make sure you check Remember it for both properties if you want your settings to survive a reboot.

Finally, you'll probably want to configure SpeedFan to run on startup and startup minimized. You can find the minimize option in the Options tab and there's a guide here that shows how to schedule a program to start automatically. Some people recommend using the Delay task for option to add a 15 second delay after startup to resolve issues with other auto-start programs.

I have tested that these settings will automatically ramp up the CPU fans when the cores get hot and that they survive a reboot.
117
Hi Glen,

The board outline is actually included on all layers but it looks like their software specifically requires it to be included separately on a mechanical layer. I've attached it on the GML layer. If you want to verify that it's correct then simply load it up into a Gerber viewer along with the other layers and they should all be aligned correctly.
118
Hi, yes I'll do that. It looks like it's a dynamic dependency required for native language support which is probably why it doesn't come up as a dependency for me.

Did you manage to source the DLL already online? (it's part of MinGW).
119
Hi,

cstdlib is the very first standard header that gets included so it looks like a problem with your ARM gcc installation. What does "arm-none-eabi-g++ -v" output for you? For me it says this:


$ arm-none-eabi-g++ -v
Using built-in specs.
COLLECT_GCC=C:\bin\arm-launchpad\bin\arm-none-eabi-g++.exe
COLLECT_LTO_WRAPPER=c:/bin/arm-launchpad/bin/../lib/gcc/arm-none-eabi/4.9.3/lto-wrapper.exe
Target: arm-none-eabi
Configured with: /home/build/work/GCC-4-9-build/src/gcc/configure --build=i686-linux-gnu --host=i686-w64-mingw32 --target=arm-none-eabi --prefix=/home/build/work/GCC-4-9-build/install-mingw --libexecdir=/home/build/work/GCC-4-9-build/install-mingw/lib --infodir=/home/build/work/GCC-4-9-build/install-mingw/share/doc/gcc-arm-none-eabi/info --mandir=/home/build/work/GCC-4-9-build/install-mingw/share/doc/gcc-arm-none-eabi/man --htmldir=/home/build/work/GCC-4-9-build/install-mingw/share/doc/gcc-arm-none-eabi/html --pdfdir=/home/build/work/GCC-4-9-build/install-mingw/share/doc/gcc-arm-none-eabi/pdf --enable-languages=c,c++ --disable-decimal-float --disable-libffi --disable-libgomp --disable-libmudflap --disable-libquadmath --disable-libssp --disable-libstdcxx-pch --disable-nls --disable-shared --disable-threads --disable-tls --with-gnu-as --with-gnu-ld --with-headers=yes --with-newlib --with-python-dir=share/gcc-arm-none-eabi --with-sysroot=/home/build/work/GCC-4-9-build/install-mingw/arm-none-eabi --with-libiconv-prefix=/home/build/work/GCC-4-9-build/build-mingw/host-libs/usr --with-gmp=/home/build/work/GCC-4-9-build/build-mingw/host-libs/usr --with-mpfr=/home/build/work/GCC-4-9-build/build-mingw/host-libs/usr --with-mpc=/home/build/work/GCC-4-9-build/build-mingw/host-libs/usr --with-isl=/home/build/work/GCC-4-9-build/build-mingw/host-libs/usr --with-cloog=/home/build/work/GCC-4-9-build/build-mingw/host-libs/usr --with-libelf=/home/build/work/GCC-4-9-build/build-mingw/host-libs/usr --with-host-libstdcxx='-static-libgcc -Wl,-Bstatic,-lstdc++,-Bdynamic -lm' --with-pkgversion='GNU Tools for ARM Embedded Processors' --with-multilib-list=armv6-m,armv7-m,armv7e-m,armv7-r
Thread model: single
gcc version 4.9.3 20141119 (release) [ARM/embedded-4_9-branch revision 218278] (GNU Tools for ARM Embedded Processors)
120
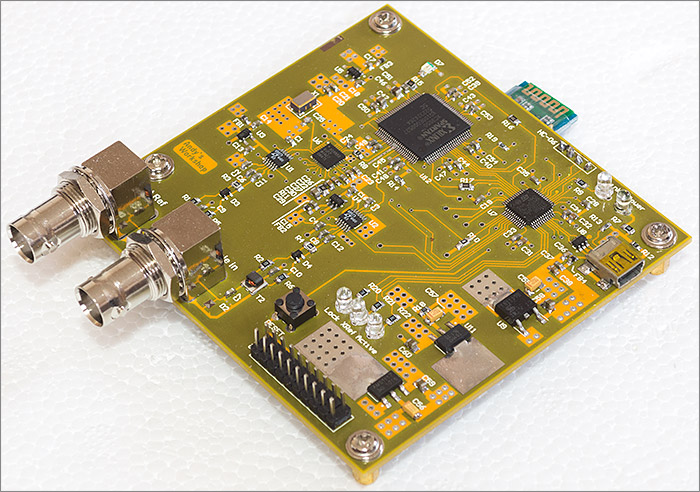
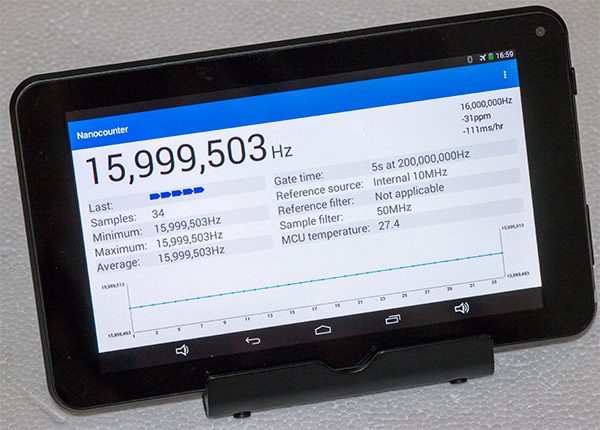
In case you hadn't already seen it I've posted a new article over in the main website that documents my frequency counter project. There's also a video on youtube. My frequency counter combines an FPGA to do the fast counting with an STM32 to do the controlling and an android app to do the display work.


Schematics, gerbers and all the source code are of course free and open source.