


Debounced buttons with auto-repeat in AVR C++
This article presents a C++ class that implements an auto-repeat button. An auto-repeat button behaves like a key on a keyboard. That is, it fires first when you press it and then repeatedly when you hold it down.
The class allows you to configure the length of time that the button waits before it starts to auto-repeat and also the length of time in between repetitions.
This article builds upon my previous article. If you haven’t already done so then I recommend that you read that article because I will refer to it and I will also re-use the test circuit.
The C++ class
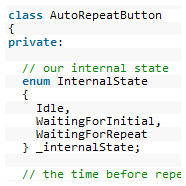
Here is the C++ header file that you will need.
#ifndef __02D4E887_5440_4a5d_836F_769935FB36B1
#define __02D4E887_5440_4a5d_836F_769935FB36B1

#include "DebouncedButton.h"


//
// extension of the debounced button to provide a button
// that auto-repeats in the same way as a keyboard button
//

class AutoRepeatButton
{
private:

	// our internal state
	enum InternalState
	{
		Idle,
		WaitingForInitial,
		WaitingForRepeat
	} _internalState;

	// the time before repeating starts
	uint32_t _initialDelayMillis;

	// the time between each repeat
	uint32_t _repeatDelayMillis;

	// debounced button handler
	DebouncedButton _debouncedButton;

	// the last time something happened
	uint32_t _lastEventTime;

public:

	// setup the class
	void setup(
			uint8_t digitalPin_,
			uint8_t pressedState_,
			uint32_t initialDelayMillis_,
			uint32_t repeatDelayMillis_);

  // Get the current state of the button
  DebouncedButton::ButtonState getState();
};

#endif
AutoRepeatButton.h
To use the class you first need to initialise it by declaring an instance of it and calling the setup() method, something like this:
AutoRepeatButton theButton;
theButton.setup(2,HIGH,500,100);
This example sets up the button on Arduino digital pin #2 with an active (pressed) state of HIGH. These parameters are used to initialise the DebouncedButton encapsulated member class.
initialDelayMillis_ is the time, in milliseconds, that the button will wait after being pressed before it starts to auto-repeat. repeatDelayMillis_ is the time in between repeats while the button is held down.
Next you simply poll the class whenever you want to know the current state of the button, for example:
if(theButton.getState()==DebouncedButton::Pressed)
{
  // do something
}
The class is asynchronous, that is you can call getState() in your main program loop and it will return the correct current state without blocking or delaying. However, you should ensure that you do call getState() more frequently than either of your millisecond delay parameters or the debounced button delay constant in DebouncedButton.h. If you fail to do that then you may get unexpected results.
Source Code
Here’s the full source code to AutoRepeatButton.cpp so you can just copy and paste into your own project:
#include <wiring.h>
#include "AutoRepeatButton.h"


/*
 * Setup the class
 */

void AutoRepeatButton::setup(
		uint8_t digitalPin_,
		uint8_t pressedState_,
		uint32_t initialDelayMillis_,
		uint32_t repeatDelayMillis_)
{
// setup the encapsulated class and remember params

	_debouncedButton.setup(digitalPin_,pressedState_);
	_initialDelayMillis=initialDelayMillis_;
	_repeatDelayMillis=repeatDelayMillis_;
}


/*
 * Get the current state of the button
 */

DebouncedButton::ButtonState AutoRepeatButton::getState()
{
	uint32_t now;

// if button is not pressed then our state machine is reset

	if(_debouncedButton.getState()==DebouncedButton::NotPressed)
	{
		_internalState=Idle;
		return DebouncedButton::NotPressed;
	}

	now=millis();

	switch(_internalState)
	{
	// first press, record that we are now waiting for the
	// initial repeat and save the time we started.

		case Idle:
			_internalState=WaitingForInitial;
			_lastEventTime=now;
			return DebouncedButton::Pressed;

	// lead up to the initial repeat. When the time is reached
	// advance the state into the multi-repeat stage

		case WaitingForInitial:
			if(now-_lastEventTime>=_initialDelayMillis)
			{
				_internalState=WaitingForRepeat;
				_lastEventTime=now;
				return DebouncedButton::Pressed;
			}
			else
				return DebouncedButton::NotPressed;

	// we're in the repeat loop. Return 'Pressed' each time
	// the time interval is passed

		case WaitingForRepeat:
			if(now-_lastEventTime>=_repeatDelayMillis)
			{
				_lastEventTime=now;
				return DebouncedButton::Pressed;
			}
			else
				return DebouncedButton::NotPressed;
	}

// should never get here

	return DebouncedButton::NotPressed;
}
AutoRepeatButton.cpp
Test Project
The test circuit is identical to that which I presented in my DebouncedButton article. Please refer back to that if you need to.
The test source code is shown below. Pressing and holding the button will result in the LED attached to pin 13 flashing in accordance with the delay settings of 500ms and 100ms.
#include <wiring.h>
#include <avr/wdt.h>
#include "AutoRepeatButton.h"


// Compatibility stub for undefined pure virtual

extern "C" void __cxa_pure_virtual() { for(;;); }


// the button class

AutoRepeatButton theButton;


/*
 * Main entry point
 */

int main(void)
{
	init();
	setup();

	for(;;)
		loop();
}


/*
 * Setup before loop
 */

void setup()
{
// setup the LED

	pinMode(13,OUTPUT);
	digitalWrite(13,LOW);

// setup the button on pin 2 (active HIGH)
// 500ms/100ms initial/repeat delays

	theButton.setup(2,HIGH,500,100);
}


/*
 * Main loop
 */

void loop()
{
// check if the button is pressed

	if(theButton.getState()==DebouncedButton::Pressed)
	{
	// flash it once

		digitalWrite(13,HIGH);
		delay(5);
		digitalWrite(13,LOW);
	}
}
main.cpp
The layout of this code is designed for Eclipse users. If you are using the Arduino IDE then you should just be able to copy and paste the setup() and loop() functions into the IDE Window.
Watch the test video
Look out for the on-board LED lighting with the initial button press followed by the rapid repeats as the button is held down.
Download the test project
The above test project is available for download. Click here to go to the downloads page to get it.
The test project has a dependency on the Arduino libraries for Eclipse that you can also get from my downloads page. You may have to adjust the Eclipse compiler C++ include and link settings to reflect the location of the Arduino libraries on your PC.